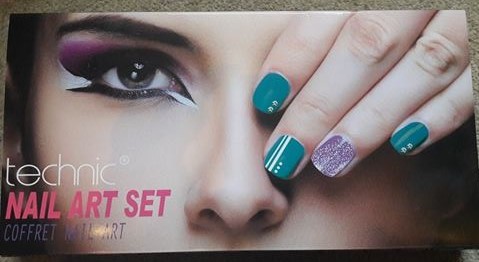
A Look At The Technic Nail Art Set That I Got For Christmas!
Hello everyone, I thought today we would have a little look at the Technic nail art set that I got as a gift for Christmas and I have also created a nail look with the stuff included, so I can give a little review on what I thought about this set. I'm not sure at how much this set was as I got it for Christmas but I have a feeling that it wouldn't of been too much. I have never tried Technic before so was looking forward to trying the set out.
This set contains 4 nail polishes, 1 nail art pen, 1 pot of nail gems, 1 sheet of nail decals, 1 emery board, 1 sponge, 1 cuticle pusher, 1 toe divider, 1 nail art tool and 1 pot of nail studs. I really like this little nail art set, and all the nail art supplies it comes with to create some nail looks as you get a bit of everything. I also like that it comes with a how to guide, and shows you some different looks you can create with all the tools and nail decals, which is brilliant for people new to nail art or just wanting to create some simple but effective nail designs.
For the nail look I created, I didn't really have anything in particular in mind but wanted to show and use a little bit of everything. This look is quite bright and maybe more suited to the spring/summer time but wanted to test all the polishes. I decided to use 3 of the polishes except the white, and painted the nails with 2 purple, 2 red/coral colour and one with the green polish. I then just played around a bit and stuck the stickers and decals on the nails, using the little black stick to place them on and my finger to dab the silver gems on. I then finished it with a top coat to seal it all in, and tadaa you can see the look I created below.
What I thought- I was pretty shocked as the polishes went really nice and have a lovely formula to them. The green colour was a little patchy on the 1st coat but with the 2nd coat was absolutely fine and the other 2 colours were very lovely formulas and painted on smoothly. I was very impressed. However, what I did learn from this process was to apply a top coat before applying the nail art decals & stickers as the colours did take a while to dry, so every time I placed the decals and stickers on it would knock the colour quite badly, so they were pretty fiddly to pop on. They did however go on nicely once they were placed and have all stayed on so far.
Overall, I think this nail art kit is really nice and would recommend it for any newbies or anyone who just wants to have a bit of fun experimenting with nail art. I will probably do a couple more looks from this kit and feature them soon on my blog, as I didn't get round to using the nail art pen or black gems included and would like to try some more of the nail art stickers. What do you think of the look? Let me know in the comments. I will be back on Friday with another post.
Thank you for visiting my little corner of the web. 😊💜
Don't forget to check out my social media to stay up to date- follow me on Bloglovin, Instagram, Twitter & Facebook. Also now have Pinterest.


Beautiful designs, different color contrast this design more.
ReplyDeleteThank you for your comment! Thank you so much, I wasn't to sure on the design but wanted to show the different variety's there was in the kit! The colours are a lot brighter than I would normally wear but they do really make it pop, haha! Have a lovely day, take care, Chantelle xx
Delete